
You’ve decided to grow corn, so fun! Perhaps you want to plan ahead or maybe you had a poor season, to grow a full ear of corn you need to focus your efforts on corn pollination. It’s so easy, let’s jump to it.
5 quick factors that affect your homegrown corn
- Pollination timing
- Crop positioning
- Affects of watering
- Hand pollinating methods
- When to harvest
Corn tassel and silk
Tassels and silk sounds a bit erotic doesn’t it? Perfect. We are talking about corn reproduction here!
The pollen packed anthers dangling from the tassels at the top of the plant get jostled by the wind releasing pollen to fall several feet, landing on the corn silk below. Each strand of silk has the potential to turn into a glorious kernel of corn if it comes into contact with a grain of pollen.

Corn tassels. 
Corn silks.
Failure to become pollinated means that particular kernel will not develop creating a “skip” or an empty space on that ear of corn. No bueno.
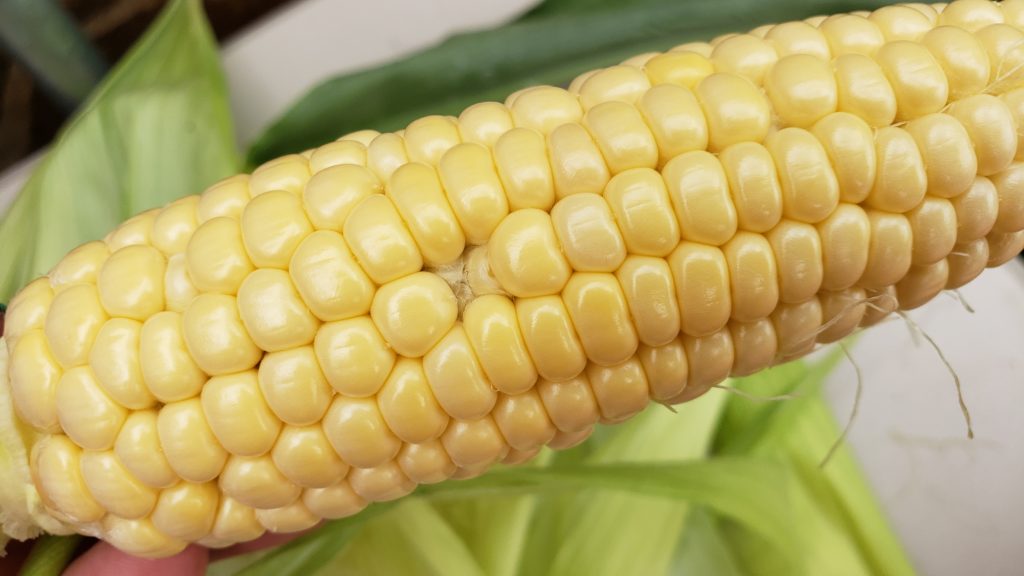
Corn pollination period
The male tassels and female silks usually emerge at the same time (within a day or two of each other) and have a window of about 6 to 10 days to transfer pollen. This is referred to as the “nick”. I think of it as corn getting fertilized just in the nick of time.
How to help corn self pollinate
Plant corn in blocks not rows. Rows are best suited for big crops (which form large blocks). You want to increase the chances that the pollen reach the silks several feet below instead of getting blown away. Keep in mind the ears on the edges of your planted area may need the most help or if your plants are grown closer together (containers) the leaves may also shield the silks on the center ears.
Importance of watering
Be certain corn gets regular water as drought can interfere with tassels and silks emerging in sync with each other. Silks are highly susceptible to water loss so when water is scarce the silks are the first to be damaged. Silks can even stop growing in the heat of the day when hydration is at it’s lowest and resume growing in the evening up to 2 inches per night! Wow.
How to pollinate corn by hand
Break off a tassel and use it to contact the silks on several ears of corn if necessary. This is best done in the morning. Fresh tassels may appear yellow in color as they are heavy with pollen.
If growing multi-colored corn, combine several different tassels at once to more evenly distribute the pollen. Using only one tassel will most likely reduce the beautiful mix of colors. Boo.
Collect pollen in a shallow dish by holding it beneath pollen filled tassels as you gently shake them. Sprinkle pinches of pollen on the silks.
My favorite, lazy method: Simply take a dry paintbrush and dip it into the pollen that collects on the collars of the leaves and dab this onto the silks.
Note: The silks on the tip of the corn grow the slowest and can get covered up by the other 550 or so silks, so making sure to get the center silks can improve the likelihood of a full ear of corn all the way to the tip!

Helpful tip: Plant only one variety of corn in a specific area as it can easily cross pollinate. Example: If growing corn in a 12″x12″ container, which can hold about 4 plants, be sure those are the same variety. The corn across the yard can be another variety but some cross pollination could be possible.
Get out there and pollinate before insects get a chance to damage (“clipping”) the silks!
How to tell if corn is pollinated?
Unusually long silks suggest that the kernels have not yet been pollinated.
Since silks detach from the kernels once they are fertilized by pollen, when testing fields, farmers sample random ears and peel back the husk and perform a “shake test” seeing how many silks fall off. Great for farmers, bad for home growers who don’t want to sacrifice an ear. Luckily we don’t have a whole field and can easily pollinate by hand!
When to harvest corn, stages of grain fill in corn

Understanding these simple stages will help you to pick a perfect ear of corn!
- Silking- Is the stage where tassels and silks emerge from the plant. The plant is ready to be pollinated at this point. Generally around 60 days after the plant sprouted from the ground.
- Blistering– 12 day after pollination the silks dry out and the kernels begin to form.
- Milking– Corn is ready for harvest! Moisture content is at about 80% and the kernels are full of a milky substance. Typically about 20 days after pollination. We’re talking not even 3 weeks for that cob to develop. Sweet! Simply peel back a bit of husk and use your fingernail to pop a kernel, it should be milky. YAY!
- Dough– about 25 days after silking, starch begins to turn the kernels doughy.
- Denting– Corn has been left on the stock too long increasing starch levels. Kernels begin to dent. Basically at his point you are drying the kernels on the plant. (Which is great too, you can do lots of things with dried corn!)
Save this pin to easily find this article when you need it

Did you grow a perfect ear of corn? Have problems? Tag @lubba.food.garden on Insta and we can celebrate your success or help you diagnose a problem. I can’t wait to hear from you! Don’t forget to tag #ilubbaplants if you love plants as much as I do. If you know anyone who needs to grow a full ear of corn with perfect corn pollination please share this post. XO
