

Non sticky, no chill sugar cookies that hold their shape.


You don’t need an excuse to make a giant batch of these big, soft sugar cookies… gift a few and you’re golden! A hero even.
This quick and easy sugar cookie recipe and simplified royal icing makes roughly 3 dozen cookies, plenty to share and give as gifts especially around the holidays. Homemade cookies made with love are sure to put a smile on anyones face!
Let’s get right to the cookie recipe ingredients. Refreshing to not have to scroll forever, eh?
- 2 cups salted butter
- 2 cups sugar
- 2 eggs
- 2 tablespoons vanilla or other flavoring
- 4 teaspoons baking powder
- 6 cups flour
- 2 Tablespoons of milk, as needed to keep dough from becoming too dry. I just add a good glug of milk- that’s how I measure it!
Instructions
- Cream butter and sugar in your mixer, careful not to over mix.
- Mix in flavoring and eggs.
- Thoroughly mix in baking powder.
- Mix in flour a few cups at a time. If it becomes to much of a strain on your mixer you may wish to mix it by hand instead.
- Roll out a few handfuls of dough on a floured surface. Dough should be 1/3″ to 1/2″ thick. Isn’t this dough great?! Not sticky at all. If after re-rolling the scraps the dough becomes too dry from excess flour, return dough to the mixer and add a splash or two of milk. Works like a charm.
- Cut out shapes and transfer to an un-greased cookie sheet. A spatula works great to move more delicately shaped cookies before lifting off the cutter.
- Bake at 350 degrees for 6-7 minutes for small or thin cookies, 7-8 minutes for big or thick cookies, 9 minutes for large, thick cookies (my favorite!) They most likely will not look done to you. You do NOT want these cookies to brown.
- Cool on baking sheet for a minute or two, transfer to wire rack or kitchen towel. Let cool completely before decorating.

Tips and tricks for perfect cookies
- Butter should be softened to room temperature. Toss it out on the counter the night before if you know you’ll have a hectic day- I do it all the time. Do NOT melt it in the microwave.
- Vanilla is a go-to flavor no doubt, but think about the possibilities: orange, almond, peppermint, lemon, coconut, rum, maple, chocolate… a combo perhaps? If you are combining vanilla and lemon for example, you would need the oil free flavor to go in the royal icing, so lemon cookies with vanilla icing would be the way to go. Sound too scary? Stick with good ol’ vanilla.
- Baking powder that doesn’t get mixed in completely may produce a blister or two on your baked cookie.
- Flour- While this recipe is great with all purpose flour I really enjoy substituting a cup or two of whole wheat flour into the mix. I find that it adds a subtle flavor and produces a slightly softer cookie. It does darken the dough just a bit but I find it rustically charming. Depends on your project!
- This dough gets thick so fit your mixer with a sturdy attachment. A whisk wont cut it. Finishing the last few cups by hand is always an option.
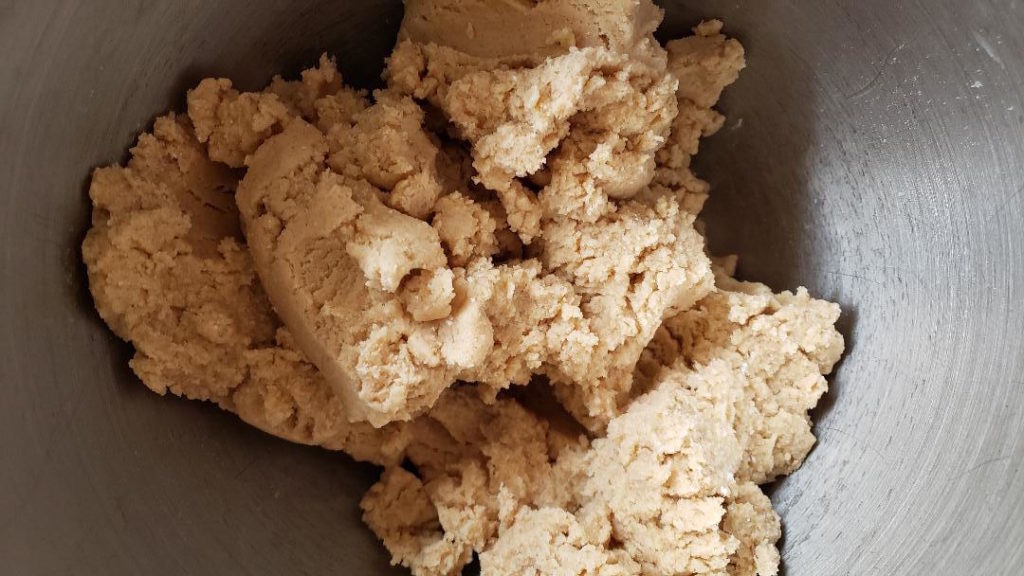
Will this be a chewy sugar cookie?
I wouldn’t say “chewy” but it will be a softer cookie. The royal icing recipe I have included will produce a nice thick coating of icing that will only get slightly hardened on the exterior but still be softer in the middle.
These are NOT the bland, overly sweet, chip-your-tooth sugar cookies of days past. Man those were gross. LOL
Why are my sugar cookies so hard?
- Your dough may have been too dry to begin with.
- Cookies were too thin when you cut them out.
- They were overcooked.
You’ll just have to dip those cookies in milk, nibble away and whip up a new batch! It only takes about 20 minutes if you have the ingredients on hand.
How to store sugar cookies:
Let cookies cool completely. Leaving them out overnight works well. Carefully stack them in sealed containers or ziplock gallon bags.
Should my sugar cookie dough be sticky?
Nope! Isn’t it glorious? It’s a possibility the dough may stick to a non floured surface or rolling pin but that is easily solved with a light dusting of flour.

Can I freeze sugar cookies?
Sure! It’s best to freeze them after they have baked and cooled but before they are decorated. Freezing them in a single layer first, then stacking them works the best.
Stack carefully, separated by parchment or wax paper if you are concerned about them sticking.
How thick should my cookies be?
Again, 1/3″ – 1/2″ is the optimal thickness. I love the thicker cookie as I find them to be softer and are a better ratio of icing to cookie. YASSS!
Do I need a rolling pin to roll out cookies?
Nope. I can’t tell you how many times I’ve used a clean wine bottle to roll out dough.
Easy royal icing:
Let’s make this simple...
Go on Amazon and order “meringue powder” and you’ll have it in time for your weekend project, or run to the nearest Hobby Lobby or Walmart. It comes in a tub and will last for a while.
This is way more fun than using raw egg whites. Also it takes any worry out of “raw egg whites” especially if you’re gifting them or are worried about storage.
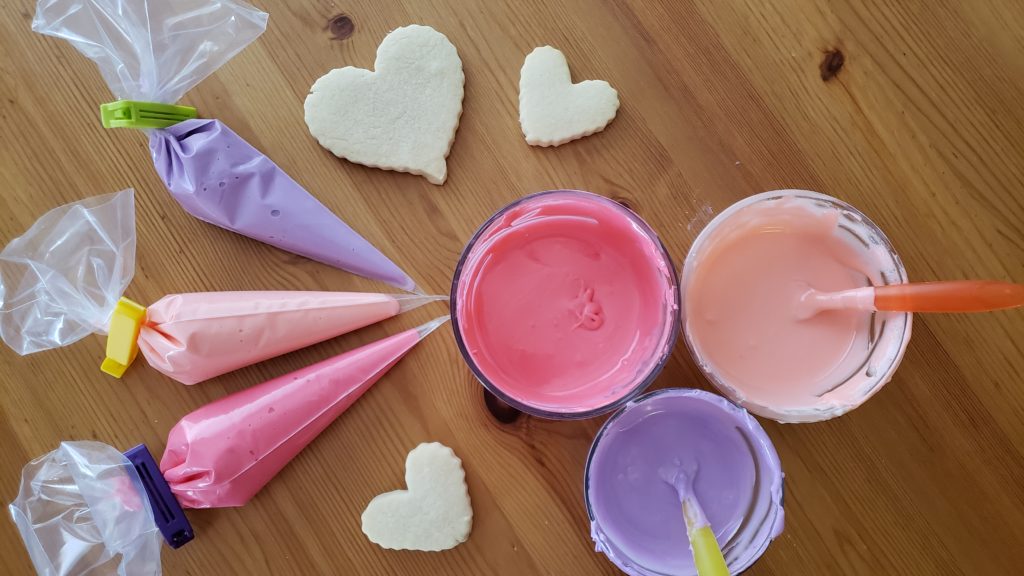
Royal icing ingredients:
- 4 cups powdered sugar
- 3 tablespoons meringue powder
- 9-12 Tablespoons water
- 1 Tablespoon Vanilla extract (or other extracts or flavorings added to taste as long as they are OIL FREE so that your icing won’t go flat) If you want bright white icing opt for a clear vanilla. Darker vanilla still produces white, just not as brilliant.
- Gel food coloring if you’d like to jazz it up with color
Instructions
- In a mixer with a whisk attachment, beat all ingredients for 4-6 minutes.
- Adjust the consistency with either more water or more powdered sugar until the icing runs smoothly from the whisk when lifted, about 5-10 seconds. Should look like Elmer’s school glue but slightly thinner.
- Put a spoonful of the icing into the corner of a ziploc bag, twist it up and snip off the very tip of the corner. You’ve just made a sample piping bag to test out your consistency. Take your worst cookie (you know, the one that broke or browned…) Gently squeeze your piping bag and trace along the edge of the cookie. The icing should come out smoothly yet stay put. Good? Great, you should be able to fill in (or “flood”) the cookie with zig-zags of icing and use the tip of the bag to smear them around a bit to fill in any gaps. This is your chance to adjust the consistency before it gets too messy! (Total time saver.)
- Now that you like the consistency of your royal icing it’s time to separate it into different bowls if you are making multiple colors. If for any reason you need to step away from your project be sure to cover any royal icing with a damp kitchen towel to keep it from crusting over.
- Add colors as you wish. Keep in mind that smaller batches of icing can be thinned too much with liquid colors. Gels work quite nice.
- Pipe on your designs. If you are adding sprinkles do so within a few minutes of icing or else the icing will start to create a film and sprinkles may not stick as easily. If piping on details that you would like to sink in and appear flush, do so before the icing films over. Likewise, if you would like your icing to stand out pipe it on after the icing has had 10 minutes or so to dry. (See photo below)

Royal icing will dry to the touch within 2 hours, longer if the icing is extra thick. I set mine out to dry for at least 4 hours or overnight before stacking them in sealed containers for storage or gifting.

For a marbled effect, dip your cookies
To put a simple icing on the top of your sugar cookie you can simply dip it! this works best with thicker cookies.
- Take a saucer and pour your icing onto it, enough so you can lay a cookie face down in the icing. Icing can be a solid color or a mixture. Drops of coloring can be swirled directly on the plate but take caution, if the color is not mixed into the icing well enough it can stain later on.
- Press the cookie in so the entire face is submerged. Using your fingers, grasp the edges of the cookie and slide it out of the dish while slightly lifting it up. The reason for not pulling it straight up is that bigger or softer cookies can break from the weight of the icing. Lifting it to the side breaks the suction.
- I use a finger or the edge of the plate to wipe the cookie to keep the icing in place.
- If you’re adding sprinkles now is the time to do it before the icing sets. If you are going to be piping more designs and want them to stand up off the cookie for a 3 dimensional look, I’d wait 10-20 minutes before adding detail.

Tips and tricks for perfect icing
- Over beating if royal icing can incorporate too many air bubbles causing foamy holes and dull appearance.
- Slightly thicker icing is great for adding finishing details giving a more 3D effect.
- You can get fancy and buy a box of piping bags, tips (size 4 is a good size for this project) and a few couplers which allow easy transfer of tips from bag to bag. These are all super handy and yes I have them all… but sometimes a ziploc with the corner snipped off works just fine, especially if you’re decorating with the kids.
Is royal icing safe to eat?
Using the meringue powder eliminates the fear of using raw eggs and any salmonella concerns. It can even be stored at room temperature for weeks.
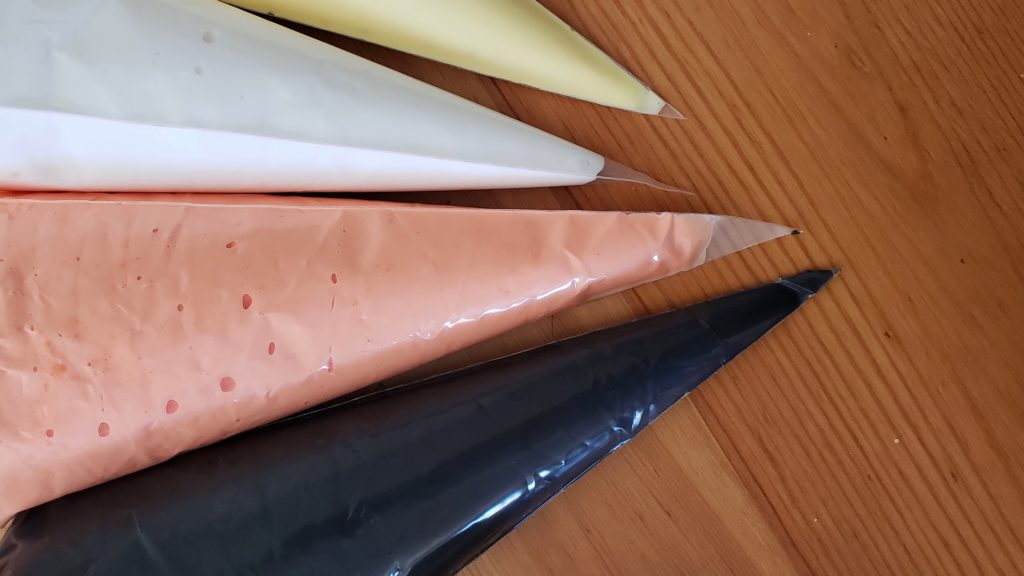
How to decorate with royal icing
There is a whole science to decorating with royal icing and the different consistencies achievable. All consistencies have their own intricate uses. Here we combine piping and flooding all in one step to make this process EASY, fun, and time efficient.
Thicken with powdered sugar, thin with water or oil free extracts until the consistency of Elmer’s school glue. I strongly recommend testing before mixing up all of your colors as mentioned in the directions above.
In the photo below I used a mixing spoon to drip/run a bit of the icing along the edge of my cookie to check the consistency. The icing held onto the cookie and did not run down the sides. Perfect! Adjust the consistency by more powdered sugar or water BEFORE you put it in a piping bag.
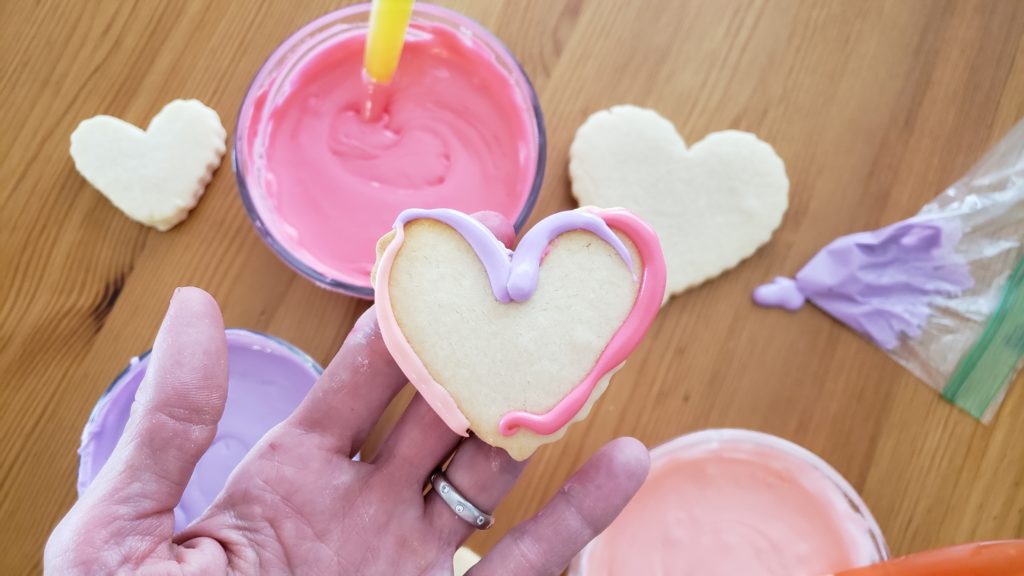
- Pipe or outline your design onto a cooled cookie.
- Fill or flood the design.
- Add sprinkles or details if you wish.
- Let dry 4 hours to overnight before storing in a sealed container.
How to store decorated sugar cookies
Store decorated cookies in an airtight container once fully dried (4 hours to overnight) If the decorations are delicate or they are for a special occasion you may want to separate the cookies with wax paper.
They can be stored at room temperature for up to 2 weeks if they don’t get eaten before then!
Avoid freezing decorated cookies, royal icing doesn’t fare well.
This recipe is so quick and easy it will no doubt become your go-to recipe for school events and holidays. Oh! How fun would this be to make for a sleepover with the kiddos? Let us know what occasion your cookies were for! XO
Share your pics by tagging me @lubba.food.garden and hashtag #ilubbafood if you love food as much as I do! See you there!