
Yay! I’m so stoked you are interested in growing strawberries! You can totally do it and I’d be more than happy to help get you started.
Here in this “How to- a beginners guide to growing strawberries”, I’m going to lay it all out for you… I’ll keep it short and easy to follow.
- Strawberry basics
- How to get strawberry plants
- When to plant
- Where to plant strawberries & in what container
- Problems to avoid
- How to keep your plants healthy
- Harvesting strawberries & collecting seeds
- Winterizing so you can have a bigger crop next year

Strawberry plant basics
Strawberry plants are perennials meaning those little cuties will go dormant through the winter and perk back up in the spring! Sure, they may look like they’re dead but if you winterize them correctly (So easy, I go over that below) they will come back better than ever a couple years in a row.
Strawberry plant production tends to peak around year 3 and slowly fade by year 5. But wouldn’t you know it- these plants create new plants for you as they grow! (I’ll go over that below too!)
Selecting strawberry plants for the home garden
There are several ways to go about collecting plants as well as different types of berries to keep in mind. Don’t fret, you can’t make a bad choice… only a better choice if given the chance.
What are June bearing strawberry plants?
June bearing varieties will give you an explosion of berries within a period of a few weeks. Great if you are whipping up a batch of jam, bad if you’ll be out of town when it happens.
What are ever-bearing strawberry plants?
Ever-bearing varieties will give you berries all the way until fall. If your summers are hot they slow down for a bit mid summer but perk back up in the fall.
What are day-neutral strawberry plants?
Day-neutral strawberries will produce fruit until fall also. They will continue to bloom regardless of the hours of daylight they receive, unlike the others that need more or less than 12 hours of daylight to bloom. Hence the name. Day neutral strawberries are meant to be planted as annuals (discarded and replanted each year).
You may not have much of a choice or a selection to choose from in your area- Great! Less for you to think about. Any strawberry is a good one!
You may be shocked to learn that strawberries tend to produce most of their fruit starting the second year. So while you may be excited to start those beauties from seed, just know your rewards come the year after. Planting strawberries from seed really tries my gardening patience, I much prefer starting with transplants. I’ll go over both, skip to what you need!
How to grow strawberries from seed
- Aquire seeds via purchase or collect from berries
- Cold stratify strawberry seeds
- Plant indoors in seed cells
- Harden off young plants
- Transplant into garden
To grow strawberries from seed be sure to grab a pack of seeds from a reputable source such as Burpee, Baker Creek Heirloom Seeds, or Park Seed. Ordering seeds on amazon can be a bit of a gamble.
You can harvest seeds from existing strawberries but just know if you are not harvesting seeds from heirloom plants you will most likely not get the same fruit. Heirlooms are never hybrids or GMOs. While heirlooms stay true to their variety, hybrids were bred for better disease resistance, flavor, higher yields, uniformity and more.
That said, do not collect seeds from store bought berries as they are most likely hybrids! I wouldn’t want you to waste your time growing a big plant just to get some wonky berry. Gather seeds from your own strawberry patch or a friend’s patch so you know what you are going to get.
To collect your own strawberry seeds take a berry that’s overripe by a few days, not a big shiny one. The seeds will start to look raised and less like little indentions. These seeds are ready to germinate! Go ahead and plant these now or rinse them the best you can so they can be dried for storage on a sheet of paper (they can really get stuck to paper towels). Let them dry completely before storing in an air tight container. Be sure to label and date them with the year!
Some seeds need to be cold stratified before planting. Plan ahead as it takes 3-4 for weeks for this step. The point of cold stratification is to mimic winter, pulling them out of refrigeration signals that winter has passed so they can come out of dormancy. Check the seed packet or google your variety so see if you need this step. Not sure if they should be chilled? Chill them anyway, it won’t hurt them no matter which variety they are.
To stratify strawberry seeds place seed packet in a sealed container or ziplock bag and keep them in the fridge for 3-4 weeks. Tip- tape the ziplock bag to the side of the fridge to keep them safe and not forgotten. Before opening allow the container to come to room temperature (overnight is good). Otherwise the seeds will absorb condensation and need to be planted immediately.
To plant strawberry seeds in soil you’ll want to do it indoors with a bright light source (grow light) a good few months before your last frost date (google “last frost date” followed by your city and state). This time includes time to germinate your seeds 1-4 weeks (typically about 2-3) and time for the plant to reach a few inches high with 3-4 true leaves. (True leaves are not the first 2 that usually appear. You’ll see the second set of leaves look completely different.)
Pack a seedling cell tray with fine potting or seedling mix. Water and let sit 10-20 minutes so the soil can become hydrated evenly and thoroughly. Poke shallow indentions in each cell, add a seed and pinch the soil shut to cover it up. Keep soil moist but not soggy. Feed with half strength fertilizer once you have a couple true leaves. You can transfer these into larger 4 inch pots to develop larger roots if you like but are not necessary.
Plant your baby strawberry plants out in your garden after your last frost date only after “hardening them off”. Hardening them off means slowly introducing them to the outside elements over the period or a week or so. Gradually setting them outside longer and longer each day so the shock doesn’t damage them.
The established mother plant will send out runners which create new daughter plants. There you go, next years plants for free!
How to grow strawberry plants from starts
Strawberry starts or transplants are what you would find at the local nursery or home improvement store. These little baby plants are generally ready for fruit production that year. Simply pop them into your soil and let them grow!
Chances are if you buy plants at a local nursery they will be appropriate for your region. They probably don’t try to sell many palm trees in Alaska, just sayin’.
Uh…. that’s it. Nothing to forget about and it doesn’t take months of planning. Wheew!
FYI– Don’t take too long getting your plants in the ground. Strawberries require 10-20 “chill hours” or hours spent between 25-45 degrees F in order to ensure flower buds will open and the maximum yield of fruit will set.
When to plant your strawberries
When to plant your strawberries directly into you garden depends a lot on your growing zone. If you are unsure visit this link to Garden.org real quick. Enter your zip code and voila! Remember this number- Take pride in it. (I’d refer you to the USDA site but currently it is not working.)
Here’s a basic guide for you to follow. Generally you’ll want to plant them out once after your last frost date. To find your last frost date, first frost date and how many days your growing season is check out this link to The Farmer’s Almanac, again enter your zip code.
| USDA zone | When to plant |
| Zone 3-4 | First few weeks of May |
| Zone 5 | April & beginning of May |
| Zone 6 | March – mid April |
| Zone 7 | December – April |
| Zone 8 | December – mid March |
| Zone 9-10 | December- February |
Where should I plant my strawberries?
Deciding where to plant strawberries is half the fun! These little cuties have shallow roots and don’t get very tall (maybe a foot) so they do well in the ground, raised beds, containers and even hanging baskets! Your soil should be around 12 inches deep but really no less than 8 inches deep. If your soil is shallow you may need to water it more often.
Be sure your planting area gets full sun and the soil has great drainage. Afternoon shade is appreciated if you’re in a hot climate and can easily be done by planting your strawberries either to the east of taller plants or in between plants as a “living mulch”. Living mulch keeps weeds down and moisture in the soil.
Avoid growing strawberries in soil previously used for tomatoes, peppers, eggplant, okra and potatoes (nightshades) to avoid catching a damaging disease called verticillium. Also, do not plant strawberries with cabbage, kale, broccoli, brussels, cauliflower, collards (brassicas) as they do not play nice and will stunt the brassica’s growth. Naughty berries.
Do plant strawberries in and around these plants:
- Spinach helps to repel pests and looks so cute next to your strawberries!
- Beans- who doesn’t love being planted by these guys? Beans fix nitrogen to the soil which keeps other plants big, green and happy!
- Chives & onions repel pests and may boost your berries flavor.
- Thyme & catnip– these herbs also repel pests.
How to grow strawberries in pots
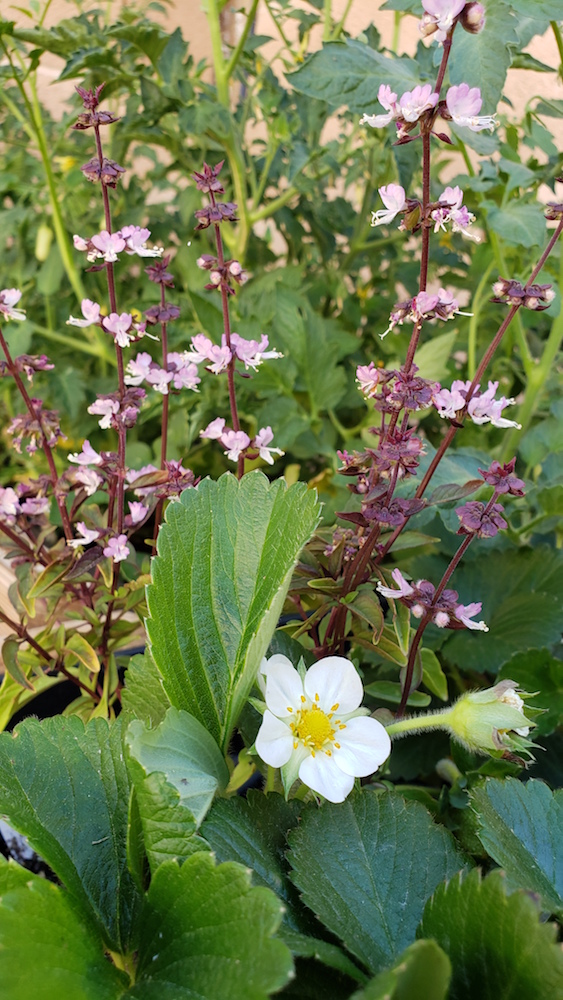
Growing strawberries (or anything) in pots is always a great option for a new gardener. Why? Because you can move them if you need to! Maybe you misjudged the sun. Maybe you didn’t realize the plant next to it was going to get so big.
Note- If you live in a colder climate the pots may need to be insulated from freezing winter temps.
Planting strawberries in pots is almost the same as planting them in the ground or raised bed:
- Be sure the soil has great drainage. These are not swamp-berries.
- Add compost or at least a well balanced fertilizer (10-10-10) to the soil before planting.
- Give them space (check the plant tag) to prevent over crowding and supply good air flow and room to send out runners. Runners will create new plants for you.
- Burry plants at the perfect depth. Look at your plant from the side- the area between the bottom of the stems and where the roots begin is called the “crown”. You want the soil to come to the middle of the crown. No roots should be exposed and no stems should touch the soil.
- Water gently. Until your plants establish a good root system they may be a bit prone to falling over.
The only difference is pots may need a bit more protection from freezing temps come winter.
How to prevent deformed strawberries
Some of you with larger gardens will have no problem with this.
For those of you with smaller gardens like a patio garden or perhaps just a couple pots outside your back door- listen to me- your deformed, half developed strawberries does not mean your plant hates you. It simply means that it’s not being properly pollinated.
A few ways to fix a pollination problem is to attract more pollinators to your garden or check your berry patch every day or two for blooms and swirl your finger inside each one. Once I started with the finger technique and got great results it turned into a habit. I’d probably do it automatically now, no matter who’s garden I’m in!
Here is a link to an extremely helpful article I wrote about pollinator gardens. Here is a specific link to cucumber pollination and to my favorite corn pollination. Game. Changers. Read em.
Keep strawberry plants happy & healthy
Feed your plants
Keep your plants fed with fresh compost and possibly worm castings (yes, worm poop). Both can be found in bags from your local nursery and possibly home improvement store. Simply add a few inches of compost around your plants several times during the growing period and water thoroughly.
Think about this- every leaf, blossom and fruit is made from nutrients in the soil (and sun)… if you are only harvesting fruit without replenishing the soil you are just slowing that plant down to a halt. This is especially true with potted plants.
I love perfectly aged compost as you can’t burn your plants like you could with other fertilizers. Bagged compost is ready to be used, it couldn’t be any easier!
Don’t forget you can sprinkle your used coffee grounds around your plants. They love it and it deters a few garden pests.
Trim/prune strawberry plants
Keep your strawberry plants happy and healthy by occasionally trimming the older dying leaves from the plant. This allows good air flow, less disease and a stronger plant.
Consider pinching off the first blooms – sounds awful doesn’t it?! Pinching off the first blooms allows the plant to better spend it’s energy growing deeper roots and making bigger, healthier leaves. Guess what that sets you up for? Bigger, healthier fruit!
Nothing is more deflating than a puny little plant with only a few grumpy berries. A big lush plant with adorable flowers and big juicy fruit?
That sight can supercharge your whole day!
For the same reason you’d pinch off the first blooms, you may want to trim back excessive runners. The mother plant will send out long stems (runners) which will eventually send up a couple leaves and sprout roots to create daughter plants. How cool is that?
While daughter plants are great for propagating new plants, it may rob your plant of energy it could spend making bigger crowns and flower stalks… which means more fruit!
You don’t need to trim them all off, just don’t let your plant go wild.
Now– If you are growing these plants for next year and you have them planted in a large bed, you can pinch off the flowers so the plant will spend all of it’s energy on more runners and roots… which means next year will be EPIC.
Mulch strawberry plants
Mulching plants helps keep soil moist and weeds at bay. Straw, plastic sheeting and pine straw are all popular choices. Yay! Whatta great use for pine needles!
When to harvest strawberries
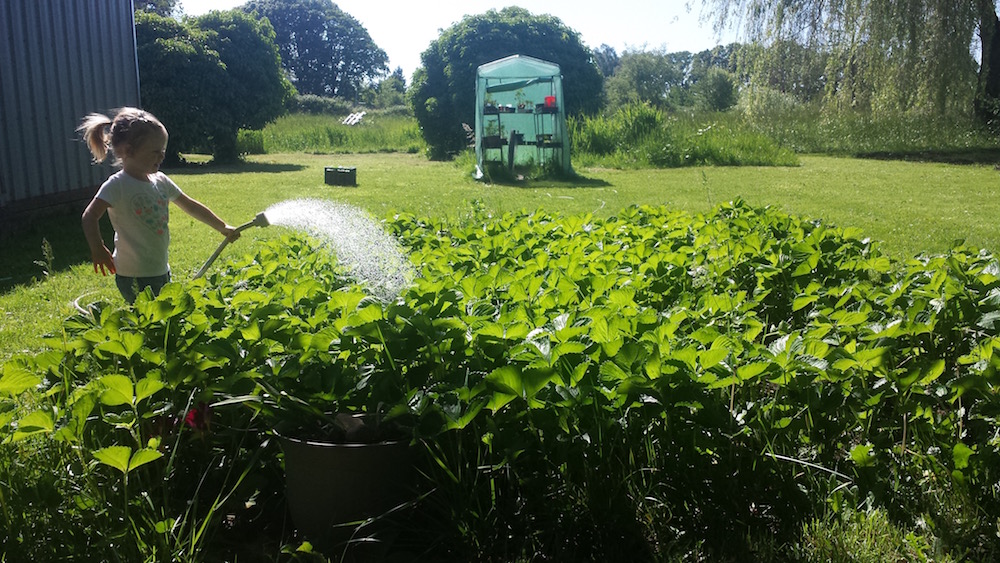
Harvesting strawberries is beyond easy. If it looks like something you want to eat, pick it! There’s no use letting it sit there long enough for the birds to get. And if you have a sneaky little 4 year old running around… good luck getting to a ripe strawberry first!

Again, if you have a June bearing variety most of your fruit will be ripe around the same time. Be on top of it.
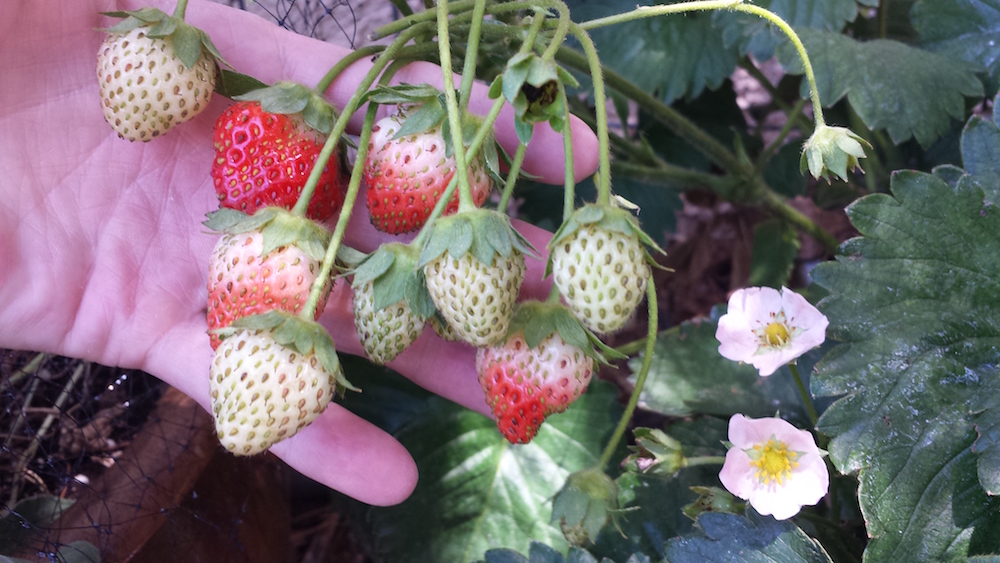
Are some of your berries soft and a bit squishy? As long as no bugs have beat you to it that tasty little berry is still great smeared on toast, tossed in a smoothie or… if it has a few friends make a quick strawberry syrup to spoon over waffles, pancakes or french toast! Yum! (This is great with raspberries too!)
If you’re wanting to start a ton of strawberry plants from seed here is your chance… That overripe berry is where it all begins. (see how to grow strawberries from seeds, above.)
Strawberry plant problems to avoid
Berries that rest on the ground tend to be more prone to bugs and pests. Try laying down a bit of straw or a sheet of plastic mulch. Strawberry supports are little mesh trays that hold the berries up off the ground. Plastic collars are cheap and easy to make out of your recycling. Hanging baskets and containers can also be a great option.
Birds, birds, birds– They make strawberry bird netting for good reason. It’s simple to toss over your precious garden gems. I’ve found that it keeps cats from walking though your garden too!
Winterizing strawberries
Cycles of freezing and thawing earth is known as heaving. This heaving action can actually heave your little plants right out of the soil potentially exposing them to hungry critters and drying, freezing winter air.
Your answer to winterizing your berry patch? Mulch.
Only after strawberry plants go dormant should they be covered with about 3-5 inches of light, loose mulching material like straw, wood chips, evergreen branches, or pine straw. Again, something light that won’t be matted down by rain or snow.
By mulching your strawberries for the winter you’re basically trying to build a little structure over/around them to provide insulation from the elements. Nice and cozy, no fireplace needed!
No need to trim off remaining leaves at the end of the season, these leaves will just help to protect the plant.
Did you know in late summer/fall strawberry flower buds begin developing within the crowns, getting ready for next year? This is why it’s so important to care for those little plants and protect them over the winter. Pamper these dormant plants like the gold mines they are.
Remember that your strawberry plants peak at about 3 years and then fall victim to disease and slow production. As you wrap up your growing season discard older plants to make room for the daughter plants you grew this year.
Fun ideas
Remember your USDA zone number you looked up earlier? Follow some relevant hashtags on Instagram! Find other gardeners in your area (or growing zone) so you can see what’s going on. Keep up to date, learn tips and tricks, find new things to grow and maybe make some new friends!
I just transplanted myself to zone 6b. Find me on Instagram @lubba.food.garden come say hi!
Start a little garden journal and jot down dates and which varietals you planted and where. Life can get hectic with kids, work, school and more… being able to easily refer back and compare your garden adventures will be valuable as you continue your rewarding hobby!
Get the kids involved too! Check out this fun little tutorial on painting garden stones. We had a blast doing this and the stones last forever! They make great labels for your herbs too.
Conclusion
- Any variety of strawberry is better than analysis paralysis.
- Plants last several years and make new plants for you!
- Buying strawberry starts can save you time… like, a whole year.
- Grow them anywhere you get good sun and great drainage.
- Keep friendly pollinators nearby. See links above!
- Feed with compost.
- Mulch to keep soil moist and berries up off the ground.
- Pinch/trim plants as needed to direct their growth.
- Winterize those babies for next year!
- Make some friends and learn a ton by following along with your growing zone hashtag!
Thanks to Ashley for inspiring this post. You can do it girl!
