Stay safe and cozy in your new digs this winter season by being aware of a few potential winter hazards and how to fix them should they arise.
Part 2 of a 3 part series…
Winterizing focus- Home
- What are ice dams?
- Eliminating cold drafts easily
- Tactics to keep your walkways clear
- How to tackle the driveway
- Outdoor faucets
- Keep your garden happy
- Carbon monoxide winter threat
Winter ice dams cause real damage to your home
Perhaps not such an issue if you are renting an apartment, but if ice happens to penetrate the roof and melt when the house warms up it can cause damage … lot’s of it.
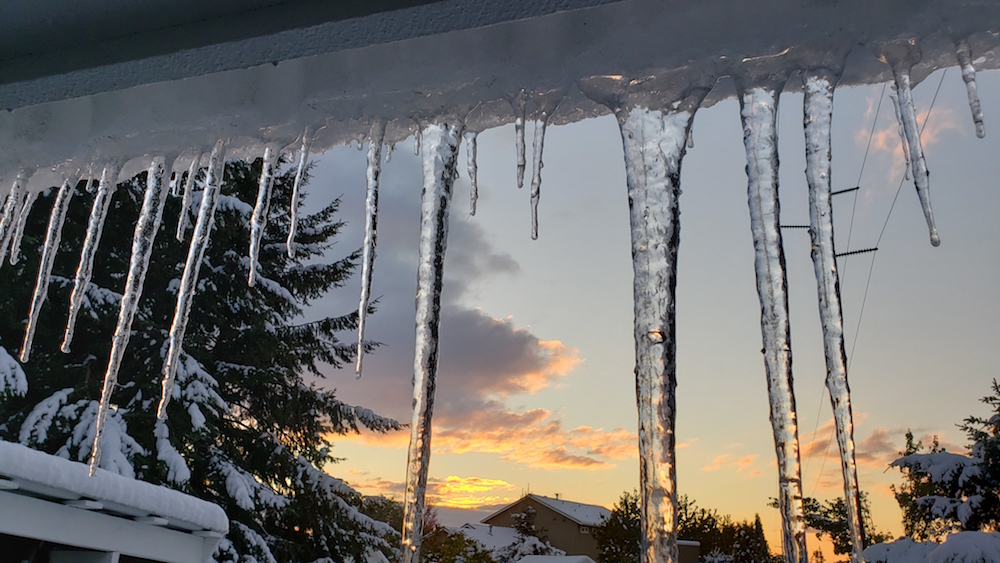
When pretty snow covers the eaves of your home, melts a little then freezes you’re looking at a build up of ice that prevents proper drainage and an accumulation of ice melt. This water leaks into your home causing all kinds of damage from bowing walls, sagging floors, blistered and discolored ceilings, mildew, soggy and useless attic insulation, and ice that can rip apart roof shingles and gutters. Ouch!
According to Homeadvisor.com the national average cost to repair drywall damage is roughly $806 for labor, site preparation, materials and clean up… that’s just for a drywall fix…
To prevent such a disaster in areas with heavy snows and harsh winters consider installing heated cabling found at home improvement stores for $45-$100. They only turn on at specific temperatures and only when moisture is detected so they don’t run all the time. They are easy enough to install but I’d recommend you have someone install them for you, and well before the cold weather arrives!
A great article that shows more ways to prevent ice dams as well as permanent fixes is this post from thisoldhouse.com.
Fix cold drafts in your home
Weatherstripping windows to stop winter drafts
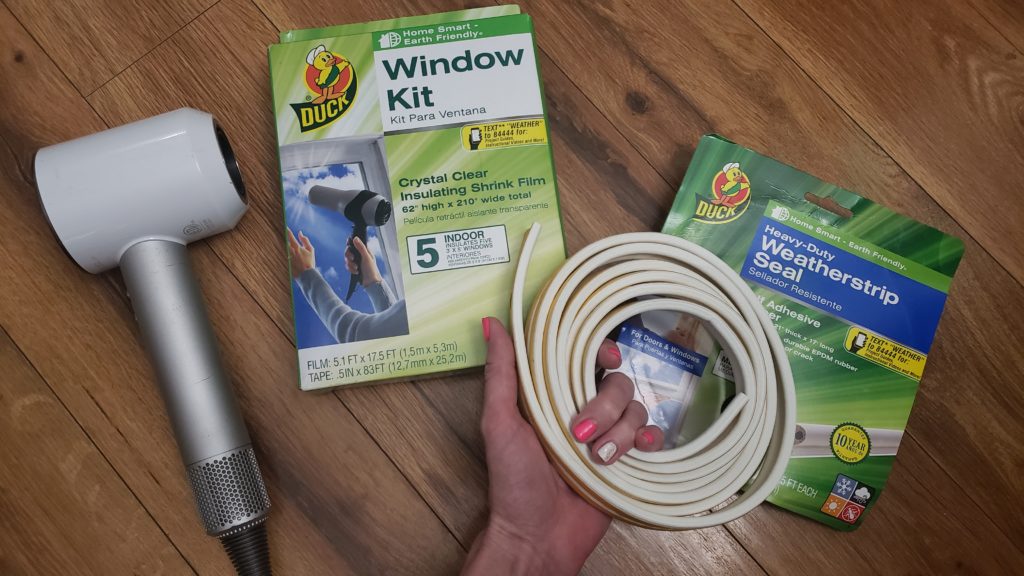
Weatherstrip those doors and windows! A roll of weatherstripping is cheap, easy and efficient. Get up close and inspect window frames and doors for drafty leaks. Knowing what size gaps you have and what color you need to match the trim will help you out big time. Snap a picture of what you’re trying to fix so you can refer to it at the store or when you shop online!
Window shrink film for easy insulation
If you have a window you don’t want a curtain on but need it insulated they make insulating shrink film. It’s like basically plastic wrap (that you use in the kitchen) but it covers your windows!
This whole idea seemed so crazy to me. True you can only use it on a window you will not be opening and closing but it will let in more light than a curtained window. More light in the winter? Yes please!
Window shrink film is typically sold as “kits” and start around $10 at Walmart or home improvement stores. Easy to install… and it’s usually located right next to the weather stripping.
Curtains
Curtains can make a world of difference in insulating your home too, especially if they are thermal curtains or hang all the way to the floor.
Even sheer curtains offer a bit of insulation compared to nothing at all. I am a big fan of any window treatment that lets the most light into the home. I need light to feel my best and my house plants do too!
To further insulate your home without shutting out the light you can pair sheer curtains with window shrink film. See below…
What are draft stoppers and window snakes?
Window snakes and door draft stoppers are simple fabric tubes that lay at the base of windowsills and doors to block and absorb cold drafts. Not only are draft stoppers and window snakes fairly cheap ($10-$40) but they are super easy to make at home too. Who doesn’t love a quick DIY?
Check insulation
It doesn’t hurt to peek at the attic or other areas that could benefit from touched up insulation.
Insulating water heaters can save up to 45% heat loss! They make pre-cut blankets to do just this. They cost $20-$40 and Homedepot.com suggests a Insulating value rating of at least R-8. Hot water pipes can be wrapped with insulation too.
Insulating heater vent ducts especially ones that go through unconditioned spaces can save you some heat. You don’t need to loose heat before it gets where you want it. Added bonus- it reduces noise and rattling.
Storm windows
Now, I have always heard of storm windows but never fully wrapped my head around the whole idea until last year when I saw a neighbor putting them up. What?! Where in the heck did this guy keep extra windows for his entire house?! They looked heavy, labor intensive and not to mention who wants to climb a ladder with a window under their arm?… Let’s just say it blew me away but it must be worth it if this guy does it every year!
Keep driveway and walkways clear of snow
You need to keep your driveway clear for the same reasons you want your walk way cleared… to prevent a build up of snow and ice. Once ice forms it’s hard to remove it so just stay on top of it. Here are a couple ways to do just that…
If you don’t mind a few moments to yourself and getting your heart rate up, grab a snow shovel or two and get to work. It’s cheap, and easy enough. I personally really enjoy a bit of silence and crisp, fresh air! Might as well learn to love your new task, right?
Clearing your driveway
A wide metal edged shovel works great for paved areas but not so much if you’re shoveling a gravel driveway, grab a regular plastic one for that. A smaller shovel with more of a “scoop” will help when you really start flinging that stuff to the side. Ha!
Start in the middle of your area to avoid shoveling the same snow twice. I use my wide snow shovel to push as much snow out of the way as possible. Don’t think you need to shovel all the way to the ground in one pass my friend, you can push it away layer by layer.
This layer method is particularly helpful to shave the snow off to the sides so you have to do less scooping and tossing. It also works great if you have to run out in the middle of a storm to reduce your work load later.
A tip to keep snow from sticking to your shovels– Since you’re basically waxing the blade of your shovel just like you would a set of skis, use that same silicone spray ($7) you used to prevent weatherstripping from freezing to your car doors. Here’s the first winterizing post here where I went over vehicle winterizing and safety (A must read if you ask me).
Getting to your car
If you are shoveling your way to your buried car, scoop a path to your driver’s side door first. By doing that you can get your car started, heating up and defrosting. Wipe off your vehicle. Hopefully you have a tarp or car cover you can just pull off and dump somewhere other than your driveway. My husband has a half-car cover so his windows are snow free. Ahh.
Remember- the less you walk on the snow the less compacted and easier it will be to shovel. When scooping try to keep the weight bearing end of the shovel as close to your body as you can. When you extend your arms out too far it will put a greater strain on your back. To save your other muscles, switch arms so you get a well rounded “work out”.
Snow blower
A snow blower is the next step up to snow removal that you can do yourself. A blower will cost you a couple hundred bucks. I bought mine for $150 from a neighbor who just got himself an up grade, so used ones could save you some loot!
Keep in mind you will need a spot to park it (they’re about the size of a lawn mower) and they will take a bit of gas. Unless, of course, you opt for a lighter weight, more compact electric blower. Mine happens to be gas but with an electric start. Pretty cool. Much easier to start it up, even for wimps like me!
Reasons why you’d want a snowblower? It’s much easier on your back than shoveling snow. Snow blowers are about twice as fast at clearing snow than shoveling.
Also of note- snow blowers are only really good for snow less than 6 or 8 inches before it starts clogging your machine.
Hey, do you have a heavy duty shop vac with a blower option? I’ve heard they can be used to clear walkways if the snow has not been compacted. I personally haven’t tried this one but I can’t wait!
Protect your outdoor faucets
Water that freezes inside hose, faucets or pipes can expand causing a rupture leading to serious disaster. How fun would it be if your faucet cracked in two? Sure, your yard could become the neighborhood skating rink, but that would be a huge mess to fix.
Remove, drain and store your hoses as well as any other attachments (splitters or such). Insulate the outdoor water spigot/faucet with a faucet cover. Faucet covers are super cheap costing about $5 for styrofoam or insulated bags. Simply tie them on and be on your way.
Keep your garden happy
If you’ve already put down roots at your new place don’t forget to throw down mulch to protect any sensitive perennials you have in the ground. Dig up any bulbs that aren’t cold hardy. Bring any plants inside that need winter protection.
Don’t forget that de-icing salts can damage garden beds so use them sparingly in areas of concern.
Carbon monoxide poisoning
Carbon monoxide poisoning isn’t just about leaving a running vehicle in a closed garage. If winter snows are deep enough to clog or cover any furnace vents or chimneys you could be potentially trapping odorless carbon monoxide in your home.
Gas fire places, central heating systems, water heater, gas and oil burning appliances, burning charcoal, generators and camp stoves can all potentially create carbon monoxide gas in your home. If you think this could be a potential hazard for you, install a couple carbon monoxide detectors throughout your home for ease of mind. They are the size of a smoke detector and cost $12-$25.
Keep your home safe. Keep piles of snow from resting against the house or foundation. Check furnace vents for snow or debris like critter nests.
Just for safety’s sake the CDC states on their website that the main symptoms of carbon monoxide poisoning include headache, dizziness, weakness, upset stomach, vomiting, chest pain, and confusion. To keep these symptoms separate from flue symptoms, install those detectors.
That’s it! You did it mama! With just a handful of effort you’ve secured yourself a cozy little place to ride out the winter in comfort… speaking of comfort... part 3 of this 3 part series will be about how to winterize yourself, winter self care if you will. Stay tuned and be safe!
Check here for a quick checklist of vehicle winter safety (post 1 of 3). This one saved me a lot of stress!