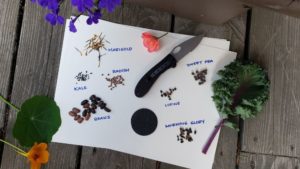
Now, why would a beginner gardener be interested in winter sowing? Because you are determined to start a garden even in the dead of winter. Me too! Start your seeds outdoors and save yourself time, effort and money.
Here’s all you need to know to get started with winter sowing:
Why plant seeds in winter? Here are the advantages to winter sowing:
- It’s so easy! Perfect for a beginner gardener or a seasoned gardener alike.
- Stronger, sturdier plants.
- Save money. You won’t need to purchase seedling trays, seedling mix, indoor grow lights, timers, heated mats, fans or shelving. Saves on your electric bill too.
- Save time. Not only will your plants be able to be planted sooner but you save the time and headache of spending a week or two hardening off your plants. Being started outdoors, the plants won’t need to adjust to the outside cold.
- Keep your seedlings safe from being washed away by heavy rains or worse yet, eaten by birds and critters.
- Gives your recycling a fresh new purpose!
- Reduces “dampening off” which is a far too common deadly fungal disease. Have you ever found our once beautiful sprouts instantly dead for no apparent reason? Yeah it sucks.
What can be planted in winter? Can I plant before last frost?
Cool weather crops and hardy annuals are great for planting now. Basically, if a plant is hardy in your region you can plant the seeds and they will sprout when the temperatures are just right. By you providing the warmth of a mini greenhouse you protect them from frost and they will sprout sooner, giving you a jump on the growing season.
Hardiness simply refers to a plants ability to survive in cold conditions. Tender simply refers to a plants inability to survive in cold conditions. Annuals are plants that die each winter and need to be replanted every year. (Need to be replanted… Annually. Get it?) Perennials are plants that comeback year after year. The top portion of the plant typically dies back but the roots stay protected in the ground over the winter and sprout up on their own in spring.

Start by checking packaged seeds for these terms:
- Self sowing- Plants that have a 12 month lifespan will grow to maturity, go to seed and leave those seeds behind to sprout the following year. Snapdragons and poppies will do this. I love it.
- Stratified/stratification– These seeds need a period of cold to trigger the end of dormancy so they know when to wake up and start growing! Strawberries come to mind. Check this post for starting your own strawberry patch!
- Cold hardy– These plants can handle the cold.
- Scarification– These seeds have tough outer shells or husks that need to be broken down first. No need to wait for critters to ingest and digest your little seeds, freezing temps most likely can break the seed down for you!
- Direct sow– These seeds don’t really need to be babied. Beets, radishes, carrots, beans…
Flowers, herbs and vegetables to winter sow
Here are but a few examples of flowers, herbs and veggies great for winter sowing… I want at least one of each!
Flowers
- cosmos
- hollyhocks
- petunias
- cornflower
- calendula
- alyssum
- violas
Veggies
- broccoli
- cabbage
- cauliflower
- beets
- chard
- carrots
- radish
- kale
- lettuces
- spinach
- bok choy
Herbs
- dill
- sage
- oregano
- mint
- parsley
- chives
I know you’ve been collecting and hoarding seeds ever since this gardening bug bit you. Ha. It’s time to break them out! Look over the package and see if you think they’d be a good fit for winter sowing. Oh, this is getting fun!
How to make a mini green house for winter sowing:
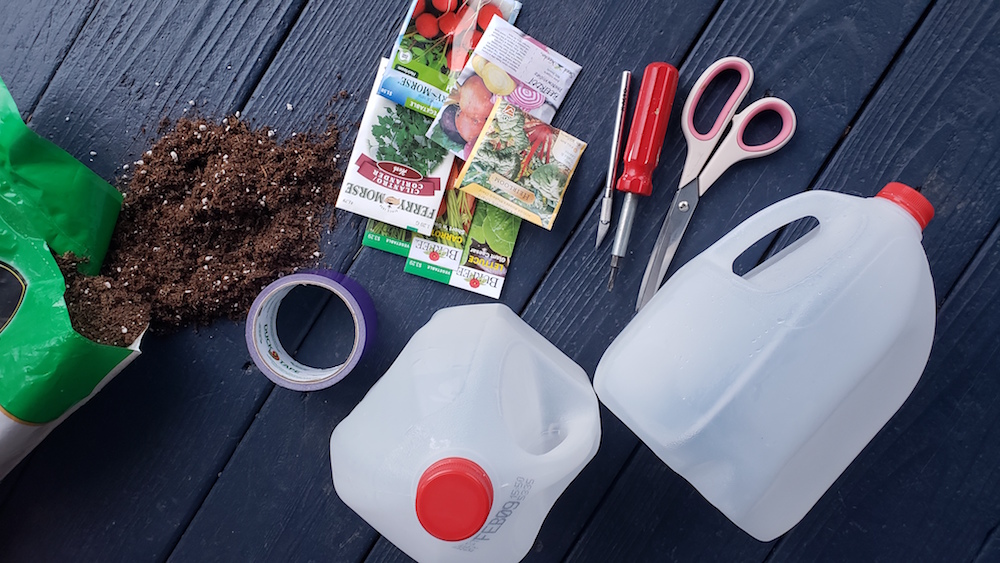
All you need to create a greenhouse for your winter sown seeds:
- A clear or semi-clear container that can hold about 3-4″ of soil that can be punctured to allow drainage and air flow.
- Heavy duty tape.
- Something to mark your container.
- Potting soil.
- Seeds!
Containers
The best place to find containers is in your recycling bin! Great containers to use are:
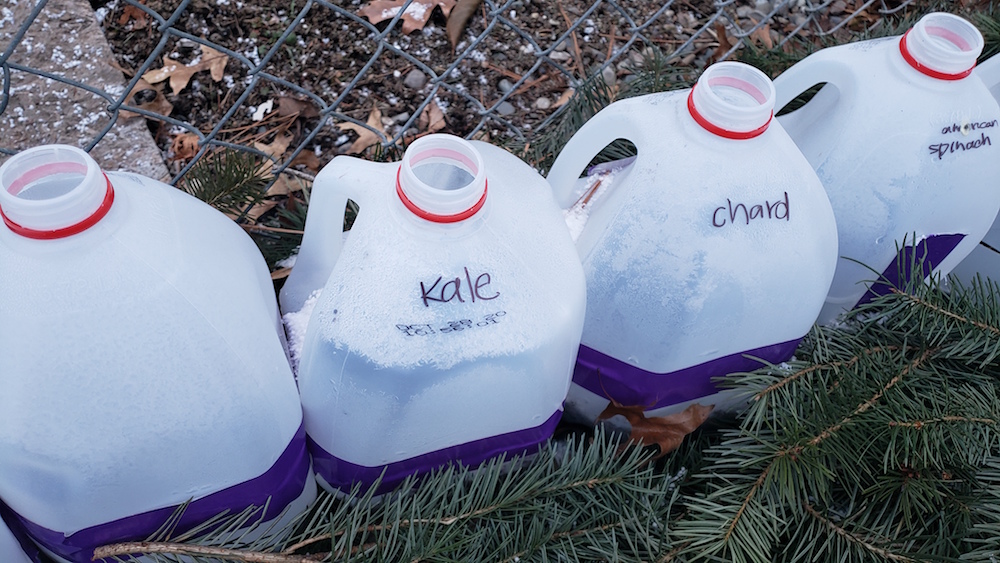
- Milk or clear juice jugs– Nice and sturdy. Simply leave the cap off for ventilation.
- Rotisserie chicken containers
- 2 liter soda bottles
- Containers for salad greens or berries- only if they are sturdy.
- Clear topped to-go containers
- Even clear plastic tubs work great! (and you won’t need tape)
You’ll want something sturdy enough it won’t collapse under the weight of any snow that may accumulate on top of them.
None of these containers are very cute to look at but once they are buried in snow you wont see them. Besides… you know they are full of garden treasures so they are easy to love.
Bonus- How great your recycling gets to be repurposed and for such a noble cause as a home garden!
Glass is a poor choice as it is difficult to add drainage. Styrofoam bottomed containers are brittle and messy. Plastic is the way to go here.
See “more tips & tricks” below to see how to easily peel off those pesky container labels!
Drainage
All of your containers need drainage in the bottom. For a typical milk jug you would probably want about 8 to 12 holes depending on the size. Remember you don’t want your soil to fall out, you just want water to drain so your sweet baby plants don’t drown.
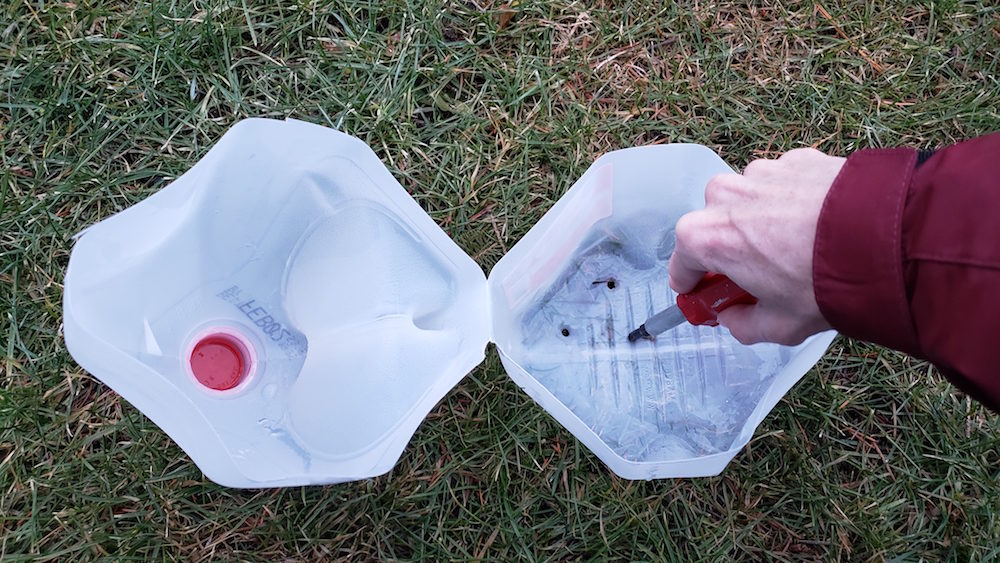
Methods for poking drainage holes are:
- Use a power drill
- Screwdriver
- Box cutter or exacto knife
Power drills can be tricky as the container may try to collapse. Putting a scrap piece of board behind your target can help with this.
My go-to: Screwdriver works best if it’s a phillips (the end looks like a “+” not a “-“) so it has more of a point. Place the container on soil, grass, packed snow or even sand. From the inside of the container poke through the container with a slight twisting motion into the grass or soil below.
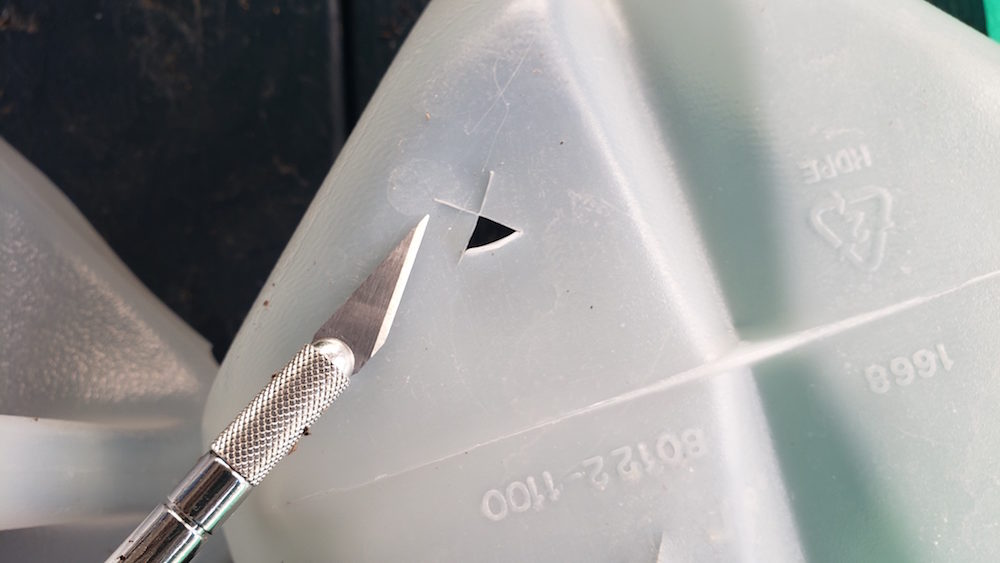
With an exacto knife or box cutter carefully cut small “X”s into the container. Think of a to-go fountain drink… you know where you poke the straw in? Make it kind of like that. Now that you’ve punched an X, bend a couple of the pieces to prevent them from closing up again.
Ventilation & air flow
Some containers will already have vents but you want something on the top that will allow in moisture in the form of snow or rain. Yes snow! Your plants will already be accustomed to the freezing temps and a little bit of snow will water your plants. Your snow covered containers will be insulated enough to keep your plants happy.
Milk jugs are magic because you can simply leave the caps off. You can hang on to these caps in case you experience super heavy rain fall and you need to cover them up for a bit… but really you most likely will not need these.
Soil
Garden soil may be a bit too heavy for the seeds and a seedling mix may be too wimpy. Don’t over think this one. Regular potting mix is just the ticket. Easy.
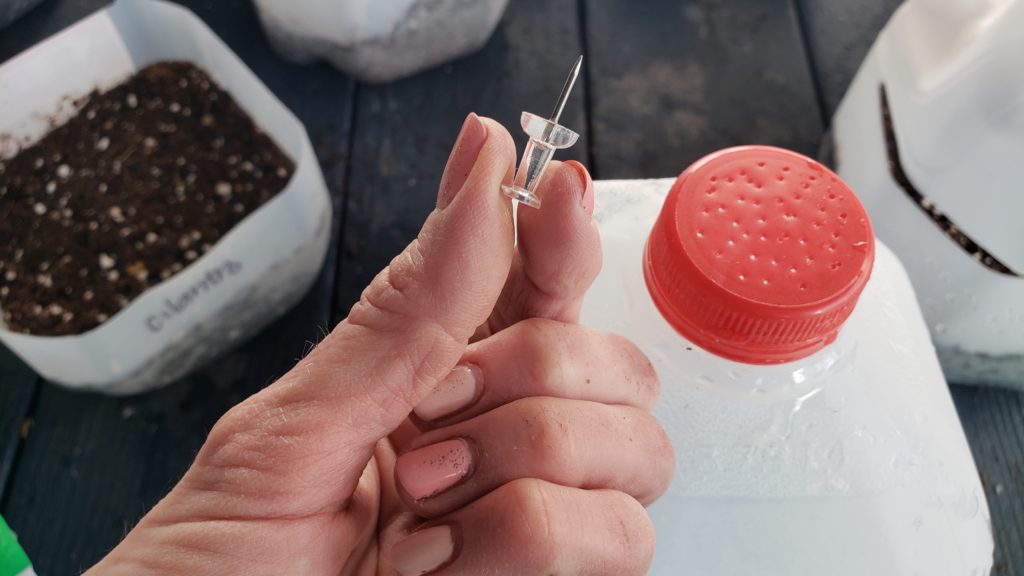
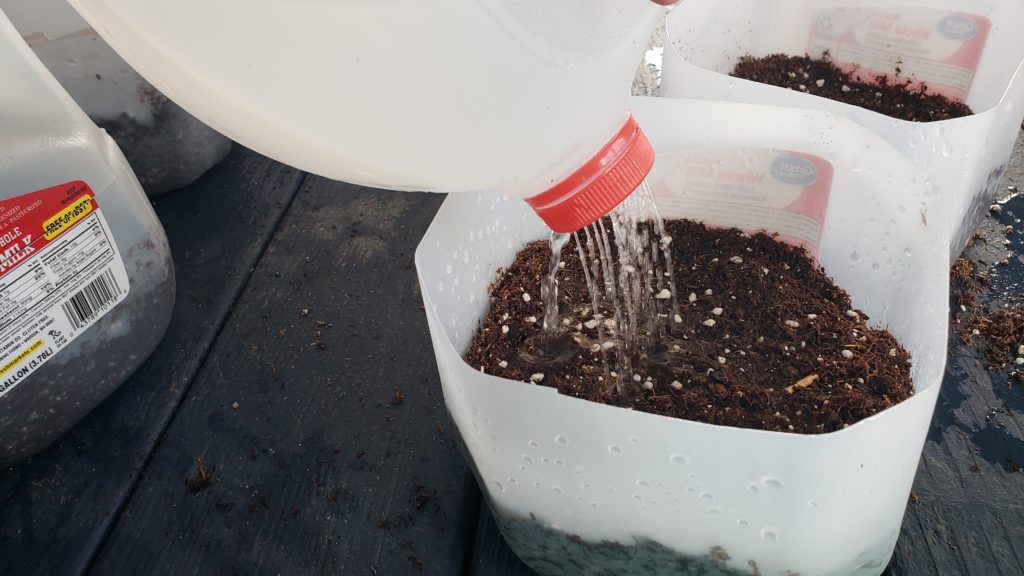
Be sure your soil is evenly moist before planting your seeds. Need to make a quick make shift watering can? Heres my hack for gentle watering…
Tape
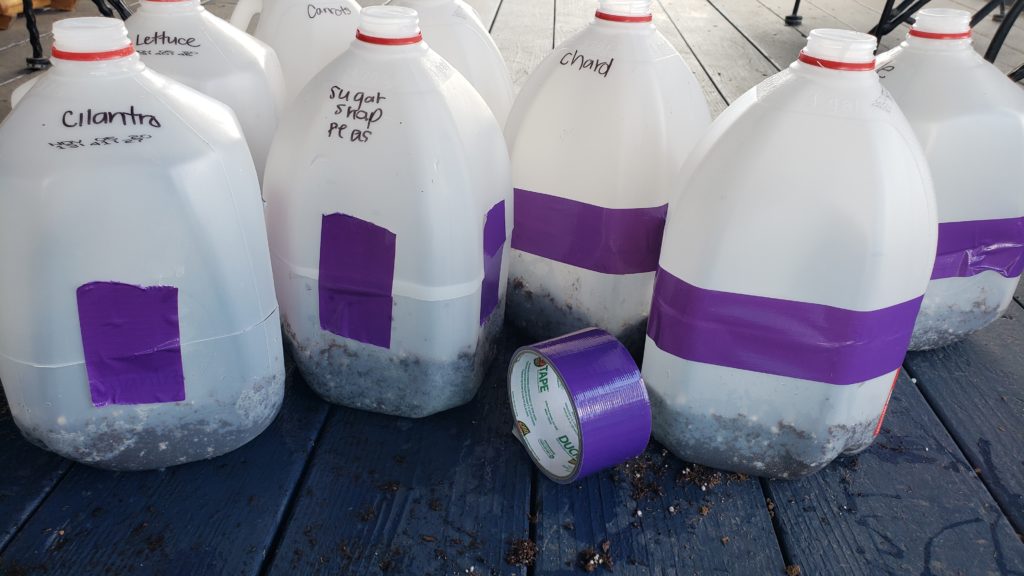
Unless you are using a clear plastic tub with a snap on lid you’ll most likely need heavy duty tape that can withstand the elements. Packing, masking, electrical, and regular old scotch tape are all garbage for this purpose. Some don’t stick and some get brittle. Trusty duct tape for the win!
Markers & labeling
You’ll most likely want to label your plants right? Sticking a standard label into your container won’t do you much good if it’s all sealed up and you need to know what it is, although, come spring when your container is bursting at the seems with green it can be a fun surprise to see who’s inside!
Most winter sowing gardeners like to label their containers on the top and bottom. The exposure to the elements up top can easily degrade even the best permanent sharpie ink so it’s nice to have the bottom labeled too.
Paint pens are an easy way to prevent your label from fading but I have found that swiping a thin layer of UV protectant fingernail polish top coat over permanent marker works like a charm! I labeled my pool/hot tub pipes using this method and they lasted for years. ha!
Where to put winter sown milk jugs and containers:
Your containers need to be placed where the sunshine and rain can reach them. Out in the open or against a south facing fence or wall… just somewhere out of the way. You don’t need the kids rolling them up into snowmen or the dogs tearing them up.
If you place your jugs into larger containers or trays to keep them from tipping over, be sure the trays have drainage holes too!
Keep in mind if your climate is a bit milder you may need to adjust the sunlight by moving them to partial shade if things heat up too much. You’d be amazed how much warmer a greenhouse is!
When should you start winter sowing seeds?
While the last week of December is go time, relax and enjoy the holidays. A new year means a new garden! I say January and February are the prime months for winter sowing.
More tips & tricks for winter sewing
Don’t forget to jot down what you planted and when in a cute little garden journal so you can repeat your successes next year and change up the ones that may not have worked out as well.
Peel off pesky milk jug labels (If they drive you crazy) by heating the label up with a hairdryer and then peeling them off.
Be sure to follow hashtags on Instagram that pertain to gardening in your USDA zone. (Not sure what your zone is? Click here to go to Garden.org to enter your zip code and find out!) See what everyone else is doing for guidance and inspiration. Being part of a likeminded community will help you out tremendously! Follow me @lubba.food.garden I’d love to say hi!
You’ll love how easy this winter sowing technique is. Go on and give it a shot! I’m so excited for you to get your garden planted! Best of luck. Let me know how it goes. XO Myra.